Ragdoll Realism Controls
Movement, aiming, tools, Settings, and time controls—so every ragdoll test stays readable.
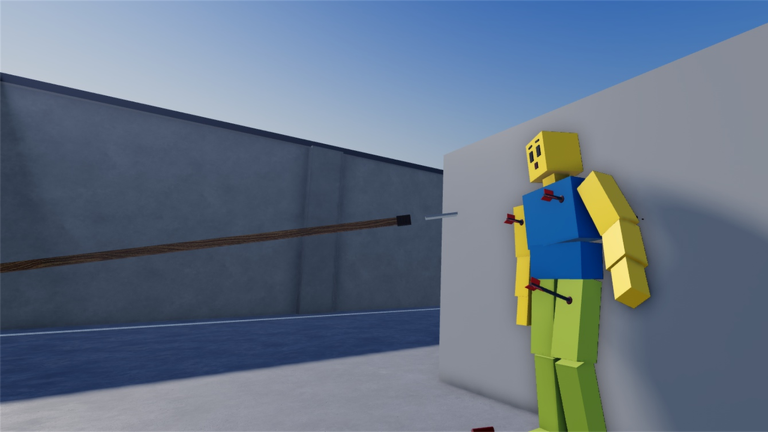
Clear controls turn Ragdoll Realism from button-mashing into deliberate physics experiments. The experience uses standard Roblox locomotion and camera patterns, then layers weapon tools, Settings for visual style and effects, and—once unlocked—Sandbox Pack time controls plus custom dummy spawning. This guide explains what to expect on PC and mobile, how to practice aiming without inventing fake keybind tables, and how control habits feed Cash farming and Sandbox sessions.
If you have not finished onboarding, skim Getting Started first, then return here.
Roblox defaults you already know
Unless you remapped Roblox globally, expect familiar defaults:
- Move with WASD on keyboard or the left thumbstick / virtual joystick on gamepad and touch.
- Jump with Space (or the on-screen jump control).
- Camera with mouse look on PC, or drag / right stick on other devices.
- Shift lock / camera modes follow your Roblox avatar settings when the experience allows them.
Ragdoll Realism does not replace these basics; it adds combat and sandbox tools on top. If movement feels wrong, check Roblox Settings (not only the in-experience Settings panel) for sensitivity and shift-lock preferences.
Weapons, tools, and the hotbar habit
The official pitch highlights four tool families:
- Guns — ranged pressure for Survival kiting and distance tests on dummies.
- Melee weapons — close-range impacts that show limb reactions clearly.
- Throwables — arcs, splash, and launch setups.
- Physics tools — direct manipulation toys that shove, grab, or otherwise stress the ragdoll simulation.
Practical control advice that does not invent unverified key names:
- Equip from the experience’s weapon / tool UI before you chase a dummy across the map.
- Fire or swing in short bursts while you learn recoil and timing—ragdoll reads better when you watch one impact fully.
- On PC, keep your fingers ready to switch tools quickly; on mobile, give yourself larger touch targets by lowering clutter in Settings if the UI feels crowded.
- After each new unlock, spend thirty seconds on a stationary dummy before using the tool in Survival or PvP.
When you need unlock order advice, open the Weapons Tier List Hub and the How to Earn Cash guide rather than guessing mid-fight.
Settings: visual style and effects as “soft controls”
Ragdoll Realism includes Settings to customize visual style and effects. Treat that panel as part of your control scheme:
- Performance first on weak devices. Heavy effects plus large ragdoll piles cause frame drops that feel like input lag. Lower costly visuals until aim tracking feels honest.
- Readability second. Keep enough impact feedback that you can tell which limb reacted. The fantasy of the game is readable physics, not maximum particle spam.
- Revisit after unlocks. New weapons and Sandbox Pack time tools change what you want to see; a cinematic preset for Sandbox clips may differ from a clean Survival preset.
If a friend joins via co-op invite, agree on similar visual intensity so callouts (“left leg,” “headshot”) stay meaningful.
Sandbox Pack controls: time and dummy spawning
Unlock the Sandbox Pack with Cash to add:
- Time controls — slow or otherwise manage the flow of time so launches, collapses, and multi-hit sequences stay studyable.
- Custom dummy spawning — place fresh targets on demand instead of hunting the map after every wipe.
Control tips once the Pack is owned:
- Start a test at normal speed to place dummies and aim.
- Engage time controls before the big impact if you want to study the reaction, not after you already missed it.
- Respawn dummies between comparable trials so results are fair.
- Reset your mental checklist: same weapon, same distance, same time setting.
Deep mode context lives in Sandbox Mode. Cash planning for the Pack lives in How to Earn Cash.
PC vs mobile vs console
PC usually offers the cleanest aim for guns and throwables. Use it when you care about precise limb hits or recording controlled experiments.
Mobile is fully valid for Ragdoll Realism, but touch aim needs patience. Favor melee and forgiving splash tools early, increase sensitivity carefully, and avoid max particle settings if the device thermal-throttles.
Console / gamepad sits between the two: stick aim works well for tracking moving zombies in Survival; fine limb shots in Sandbox may take more practice.
Whatever the device, warm up in Sandbox for two minutes before a Survival wave or a Scenario timer (Stop the Intruders, Ambush Escape).
Survival, PvP, and Scenario control habits
- Survival: Keep moving between shots; zombie pressure punishes tunnel vision. Switch to a trusted gun when melee crowds form.
- PvP: Strafe and camera discipline matter more than meme launch tools. Learn one loadout deeply.
- Stop the Intruders / Ambush Escape: Timer awareness is a control skill—glance at objectives between engagements, do not empty a magazine into one dummy while the clock dies.
- Co-op: Call weapon switches and time-tool use so teammates are not surprised by slow-motion mid-push.
Patch cadence for these modes is tracked on the Updates Hub.
Practice drills (no special scripts required)
- Single-impact drill: One shot or swing, full watch, then reset or respawn.
- Tool-switch drill: Alternate gun → melee → throwable on the same dummy line.
- Time-pack drill (after unlock): Repeat the same launch at normal speed and under time control; note what you missed at full speed.
- Survival movement drill: Strafe while firing; never plant feet for an entire magazine.
Skip unverified third-party key overlays. If you experiment with community admin menus, read safety notes on the Scripts Hub first—executors can cost accounts.
Common control mistakes
- Spamming tools so fast that ragdoll reactions blur together.
- Ignoring Settings until the session already stutters.
- Buying random unlocks before learning aim on starters.
- Pasting “controls charts” from other ragdoll games (different titles use different binds and UIs).
- Chasing codes instead of learning inputs—see Codes Hub for the real promo status.
Related guides
- Getting Started — first-hour loop.
- Settings & Visual Effects — tune visual style and effects for readability and performance.
- How to Earn Cash — fund unlocks that expand your control options.
- Sandbox Mode — where time tools and dummy spawns shine.
- Guides Hub — full how-to index.
- Weapons Tier List Hub — what to unlock for your preferred input style.
Master readable inputs first; flashy clips come after your hands know the tools.
Frequently Asked Questions
Quick answers to the most common Ragdoll Realism questions.
Does Ragdoll Realism use normal Roblox movement keys?
Yes. Expect standard Roblox move, jump, and camera controls, with the experience adding weapons, tools, Settings, and optional Sandbox Pack time features on top.
Where do I change visual effects that hurt performance?
Use the in-experience Settings panel to customize visual style and effects. Lower heavy options if frame rate makes aiming feel delayed.
What control benefits does the Sandbox Pack add?
Time controls let you manage the flow of time during experiments, and custom dummy spawning lets you place fresh targets on demand.
Is mobile aim good enough for Survival?
Yes with practice. Warm up in Sandbox, prefer forgiving tools early, and reduce visual clutter so touch targets stay clear.
Should I copy keybind charts from other ragdoll games?
No. Other experiences use different UIs and binds. Learn Ragdoll Realism’s own tool UI and Settings instead of pasting unrelated charts.